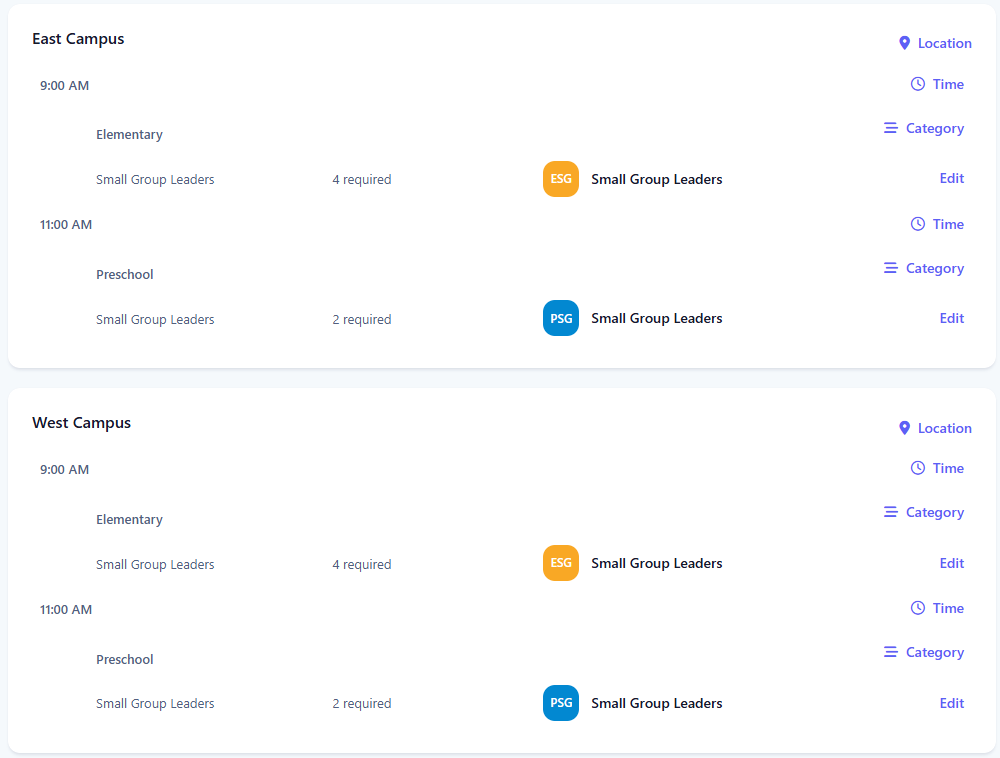
Event Positions
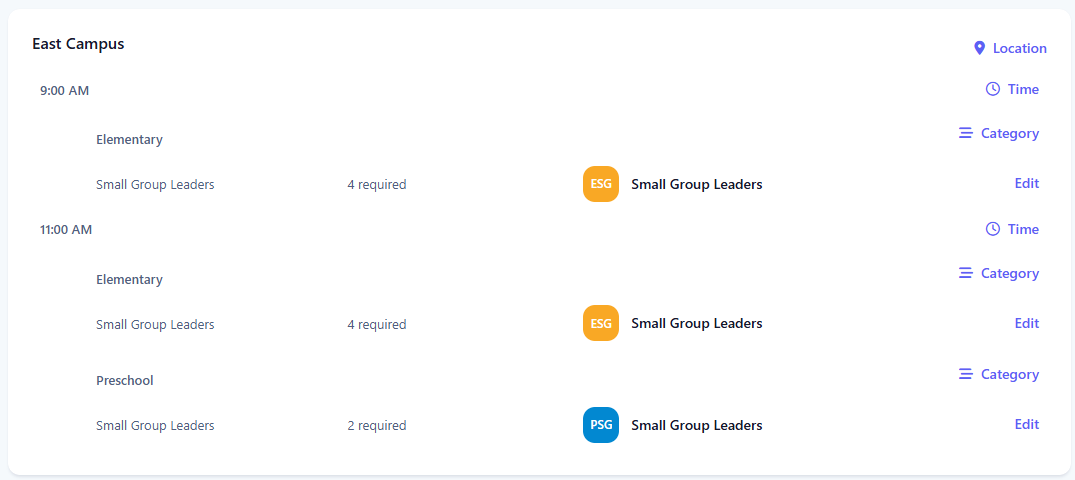
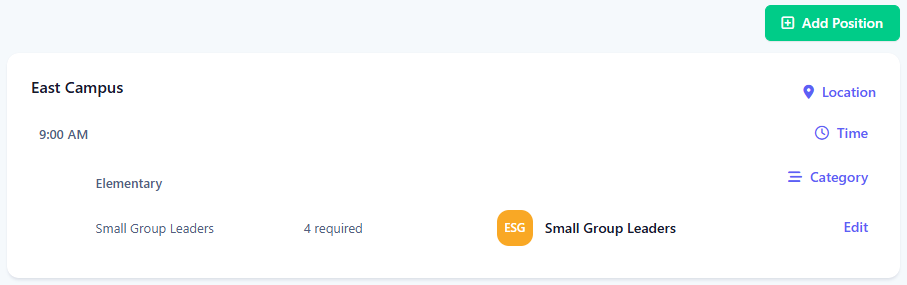
For each event, you can define the positions needed and how many of each are required, based on time, area, and even different locations if necessary, and define what teams are allowed to be scheduled in those positions. These positions will then be used to generate a schedule when you create a series within the event. A position has the following properties.
| Property | Description |
|---|---|
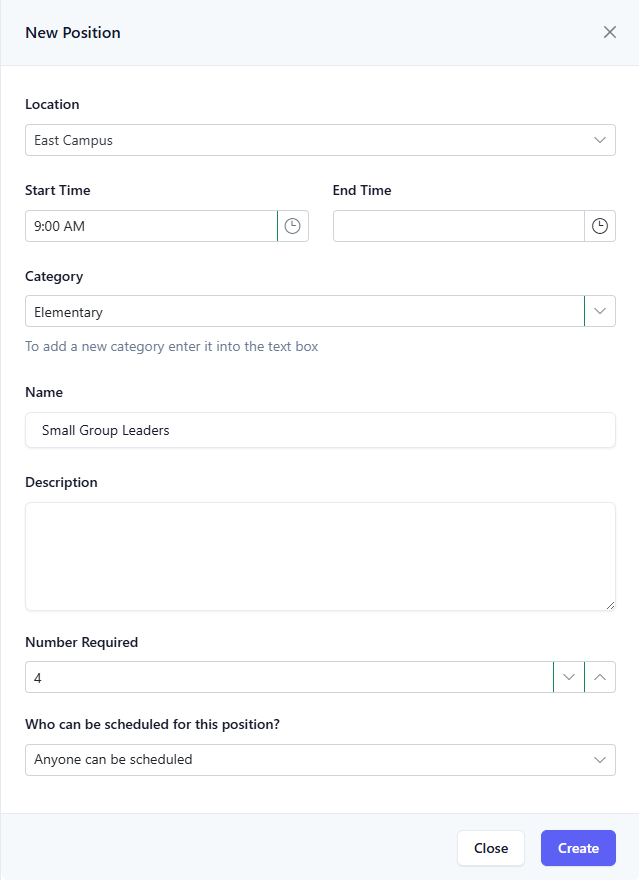
| Location | Optional location the position is associated with. This field will only be available if one or more locations have been created. |
| Time | Optional start and/or end time of the position, such as 9am or 1pm - 2pm. |
| Category | Optional category of the position, used to group similar positions. |
| Name | Name of the position. |
| Description | Optional description of the position. |
| Number Required | Number of people required for the position during the event. Minimum is one. |
| Who can be scheduled for this position? | By default, anyone can be scheduled for this position, but you can select one or more teams that are only allowed to be scheduled for the position. |
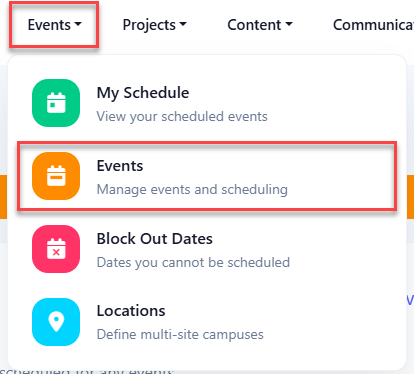
Select Event to Edit
From the menu, select Events, and then select Events.
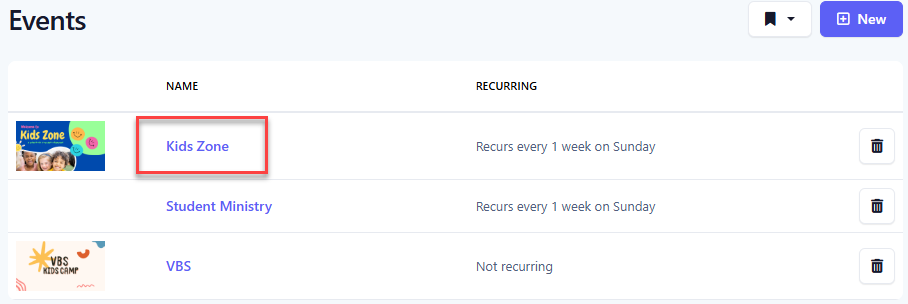
Click the link of the event to edit.
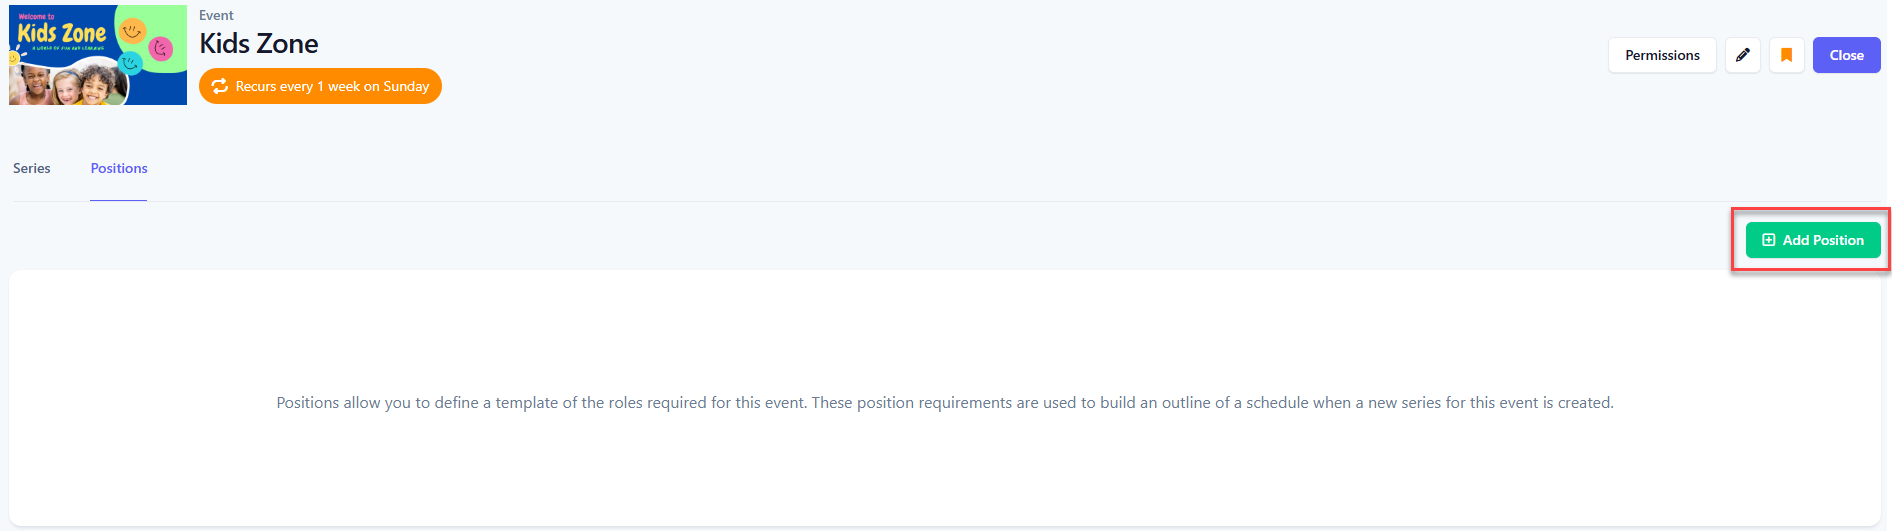
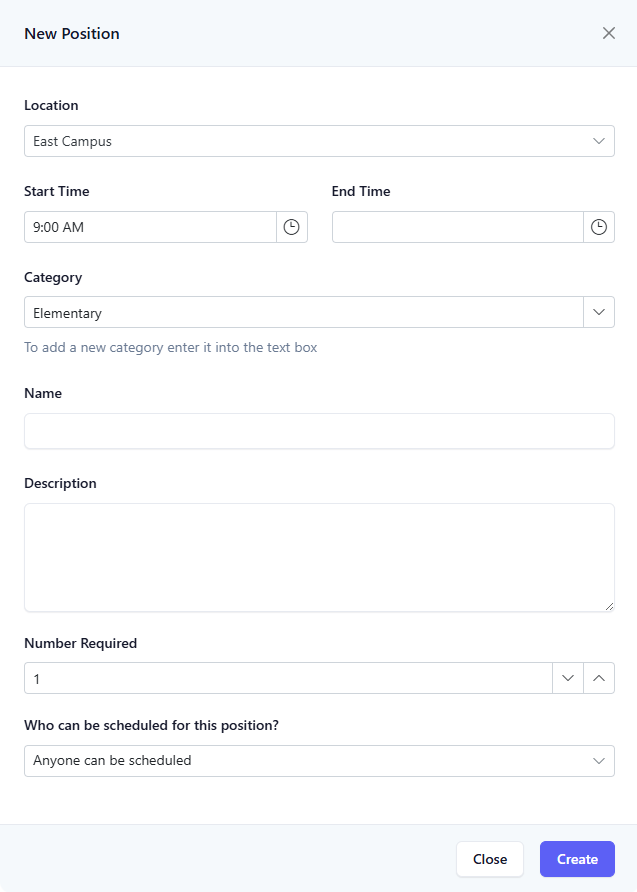
Add New Position
Under the Positions tab, click the Add Position button.
At the New Position panel, fill in the details for the new position. The Location field will only be available if one or more locations have been created.
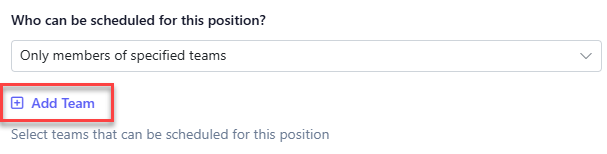
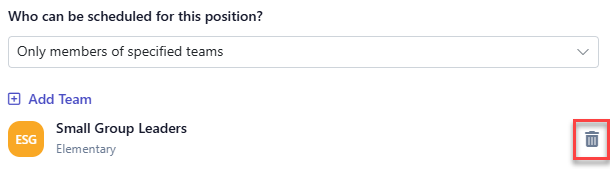
By default, anyone can be scheduled for this position. To set this position to only allow one or more teams to be scheduled for this position, set the Who can be scheduled for this position option to Only members of specified teams. Click the Add Team button to add the teams for this position.
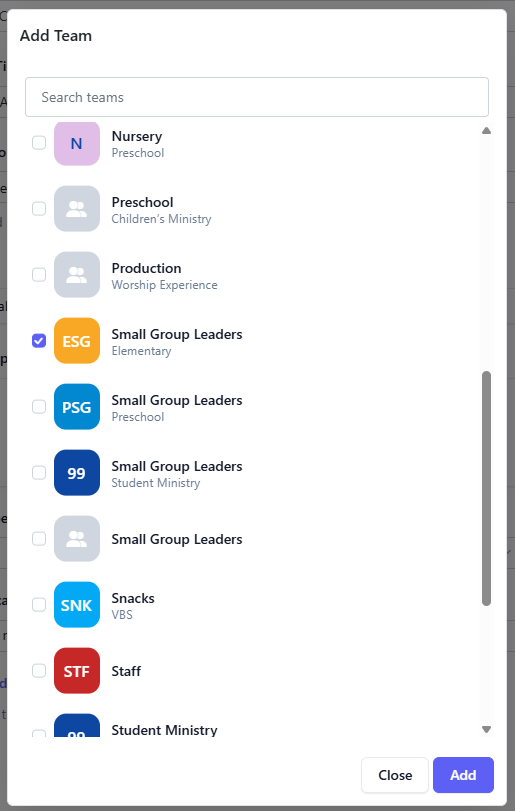
At the Add Team dialog, select one or more teams and click the Add button.
The team is added to the list of allowed teams.
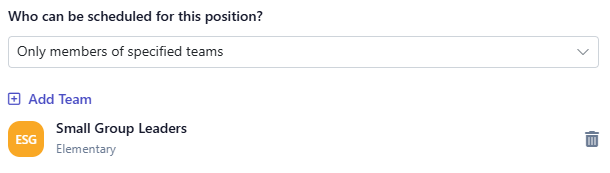
To remove a team from the list, click the Delete button.
Click the Create button to add the new position. Upon success, the position is added to the event.
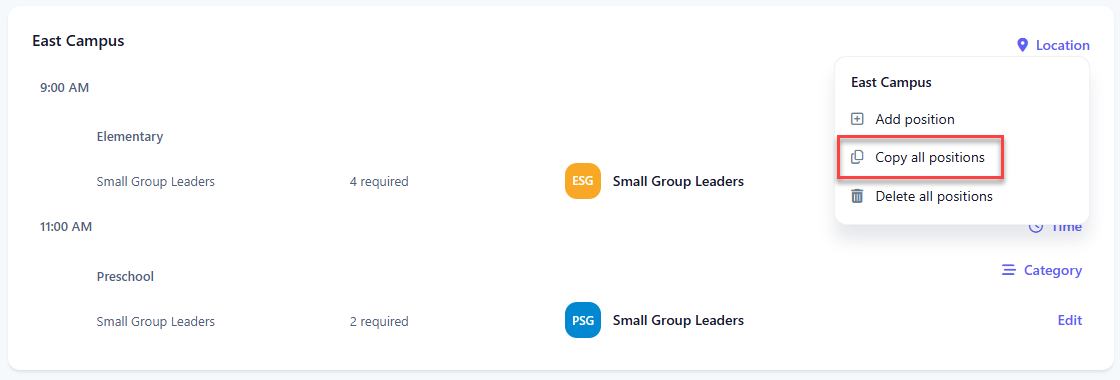
Add Position at Location
You can add a position directly to a location using a shortcut.
Click the Location button of the location to add the position to and then select Add Position from the menu.
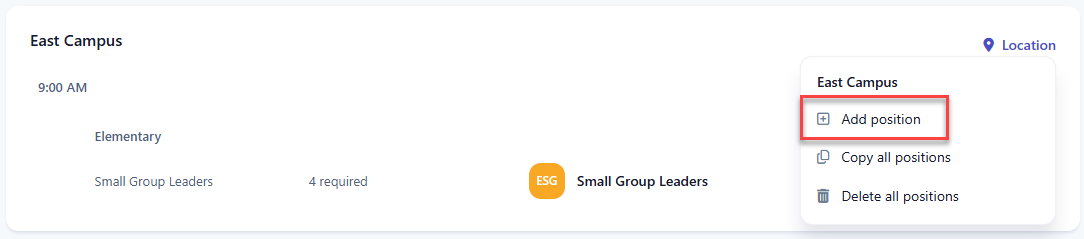
At the New Position panel, fill in the details for the new position. The Location field will be populated with the selected location. See the Add New Position section above for details on setting who can be scheduled for the position. Click the Create button to add the new position.

Add Position at a Time
You can add a position directly to an existing time using a shortcut.
Click the Time button of the time to add the position to and then select Add Position from the menu.
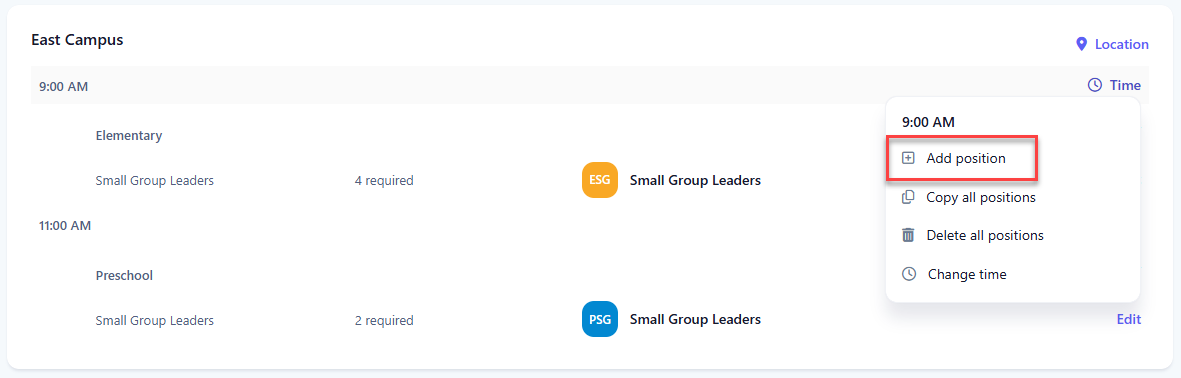
At the New Position panel, fill in the details for the new position. The Location field (if visible) and the Time fields will be populated with the selected time. See the Add New Position section above for details on setting who can be scheduled for the position. Click the Create button to add the new position.

Add Position in a Category
You can add a position directly to an existing category using a shortcut.
Click the Category button of the category to add the position to and then select Add Position from the menu.
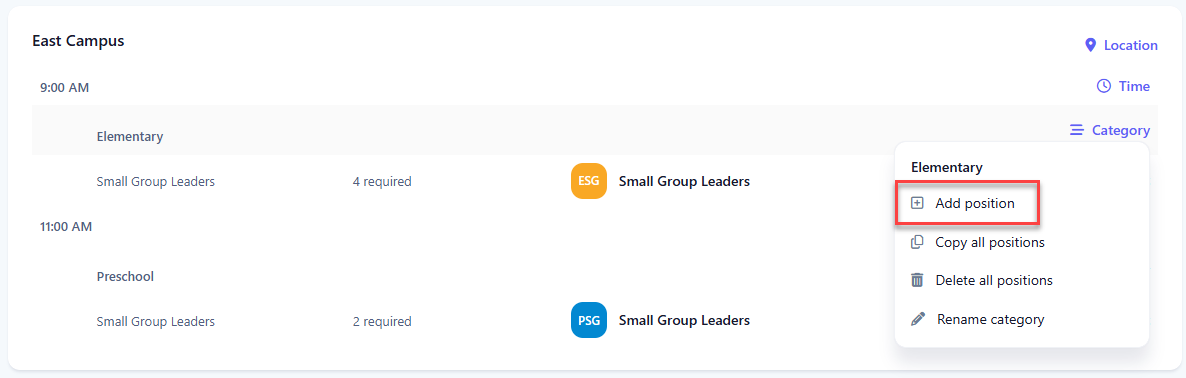
At the New Position panel, fill in the details for the new position. The Location (if visible), Time, and Category will be pre-populated. See the Add New Position section above for details on setting who can be scheduled for the position. Click the Create button to add the new position.
Copy Positions at Location
You can copy all positions at a location to another location.
Click the Location button of the location to copy the positions from and then select Copy all positions from the menu.
At the Copy Positions From Location dialog, select the location to copy the positions to from the Copy To dropdown. Click the Copy button to copy the positions.
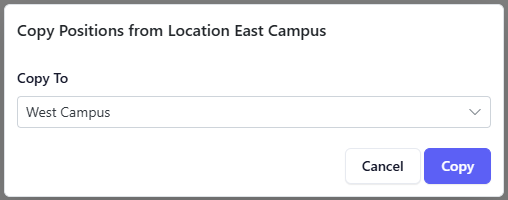
Upon success, the positions are copied to the new location.
Copy Positions from a Time
You can copy all positions at a time to another time.
Click the Time button of the time to copy the positions from and then select Copy all positions from the menu.

At the Copy Positions From Time dialog, select the new time to copy the positions to. Click the Copy button to copy the positions.
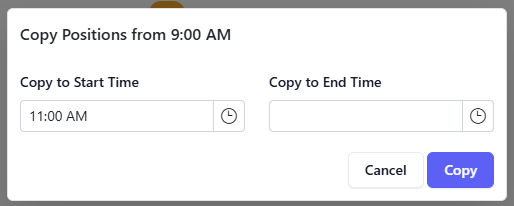
Upon success, the positions are copied to the new time.